Quantcast
Channel: AskME4Tech blogs
Viewing all 85 articles
Browse latest View live

Backup Physical Servers and Workstations in your enviroment with Veeam

$
0
0

Today use Virtualization Technologies for the Servers in the environment. Physical Servers aren't used anymore only as HOST for Virtual Servers or in case that you have a situation that allow only Physical Server and not supported by Virtual Server. In this case what is the Backup Startegy?

In some other conditions maybe have Workstations that must be backup. For example as IT i am the first that need at least one backup for my Laptop. What about your Directors or CEO in your company that you are work? Do you have face any situation that the Laptop of your CEO crash and lost all the files? Do you remember the moment that must go in his office and tell him that unfortunately your files lost. I don't want to imagine.

In the past i wrote an article Create System Image Backup in Windows 8.1 for your workstation or Laptop with Windows Backup but sometimes it's not enough. 

I use Veeam Backup & Replication to backup and Replicate all my Virtual Servers. I use Remote Desktop Servers for my clients but also have Workstation ,Laptop and one Physical Server that are necessary. 

I found Veeam Endpoint Backup interesting and also is free. Until now i use it only in Workstation and Laptops and not in Physical Server yet. I working on it and soon i have the results how works in Physical Server.

So Today i will explain the steps that need to proceed and start backup your high Importance Workstations and Laptops.

  • First it's necessary to Signup in Veeam Site to proceed with any download.
  • If you have an account just Sign in unless take 10 minutes to Sign up.
  • Download the Veeam Endpoint Backup from https://www.veeam.com/endpoint-backup-free.html
  • Install the Veeam Endpoint Backup in the Workstation that you want to take backup.
  • Before Finish it will ask if you plan to Backup in USB to plug in. If plan to backup in external USB Disk plug in and click Next to follow the Wizard. In this scenario i will not take Backups in USB Device so i will check the option Skip this .... and click Next.

  • Now Veeam ask you to create Recovery Media and recommend to do it. So i will click Next to proceed in Recovery Media Creation Wizard.

  • Select Media Types that you want to has the Recovery Media.Select ISO Image. Leave the check as it to include hardware drivers and network connections. Click Next.

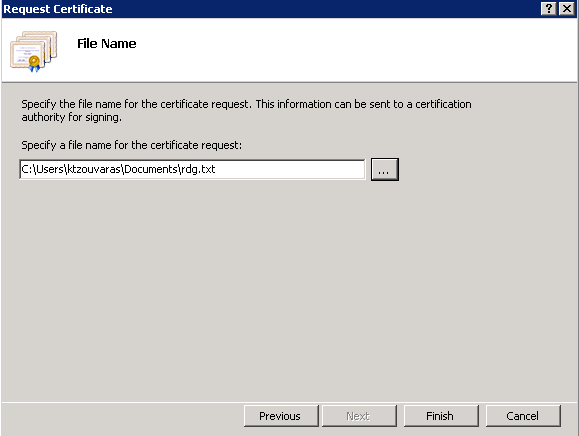
  • Specify the path that will save the ISO and credentials if needed.

  • Review the settings and click Create 

  • Wait to finish the creation of the Recovery Media.

  • After created the Recovery Media go in Start and find the Veeam Endpoint Backup.
  • Select Configure Backup to open the Wizard
  • Now select what Backup Method that you want. This is your choice but for the scenario i will choose Entire Computer.Click Next

  • Here you can select between 3 options. If you already use Veeam Backup & Replication you can select the last option and manage the Backups from Console of Veeam Backup & Replication. Because i use Veaam Backup & Replication i will select this option and click Next. If you don't have Veeam Backup & Replication you can select between 2 options of Local Storage or Network Storage. This is your choice where you want to take the backup. Click Next.

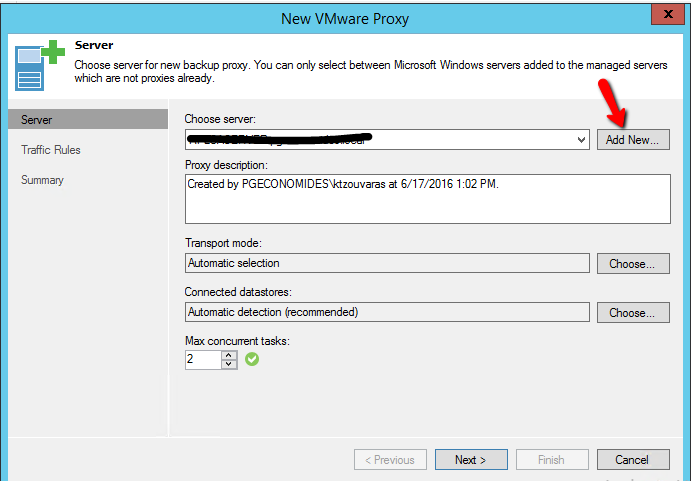
  • Type the ip address of the Veeam Server and the credentials that need for your Server. Click Next.

  • Veeam will find the Default Repository of your Server. Unfortunately i don't know why can't see the other Repositories that i have in Veeam Server. If it works like this then means that must have Free Space in your Veeam Server because thet backup will save it Local in the Server. Select how many Restore Points you want to have for your PC.Click Next.

  • Schedule the time that you want to take Backups and Be carefully with the last option that ask how many hours to run the Backup and after must stop. Click Save.

  • This is only a Summary. Click Finish or check Run Job when click Finish to start the Backup immediately.

  • If you start the Backup Manually you will see a beautiful Graphic Interface of the Backup Progress.

  • Click in dots to see more details of the Backup.

I use it last 2 weeks for only one Workstation and for my Laptop. It works great without problems. It's a good solution for Workstation and Laptops because it's Free and you have also File Level Restore.

I found it very helpfully but i believe that you have your own strategy for Workstations and Laptop Backups. Share your Solution in our Commented System with others.


Enable and Run Linux Bash Shell on Windows 10

$
0
0

Windows 10 offer a new feature that must write in my blog. Include in Windows 10 an Ubuntu based bash shell. This isn't a Linux software compile for Windows or a Virtual Machine like Cygwin. It's a feature of Windows that you can enable it anytime that you want. Base on the announcement in Windows Blog  you can run <<Bash scripts, Linux command-line tools like sed, awk, grep, and you can even try Linux-first tools like Ruby, Git, Python, etc. directly on Windows>>.

Before start to use it i am here to explain some limitations and prerequisites to use the new feature. 

First of all it is beta and maybe some things break and don't work correctly. Until now any command that i have use works great. But I'm not Linux advance user.

How can install the Ubuntu bash shell?

Verify the Windows 10 Build.

Before start to search and read how can enable Ubuntu shell be sure that you have at least Windows Build 14316. To find the Build that you have you must follow the steps

  • Click in Start and select Settings
  • Select System

  • In the bottom select About
  • Here you can find all the info that you need.


Register in Windows Insider Program

To find your new feature in Windows you must be a  part of Windows Insider Program. Don't worry it's free and you can use new features. Base on the article How to Become a Windows Insider and Test New Windows 10 Features by Chris Hoffman a contributor in How to Geek you can register in Windows Insider Program

Enable Insider Preview Builds

Before enable Insider Preview Builds note that you will receive Updates and Apps that maybe are incomplete. So it's prefer to use Insider Preview Builds only in the PC that are comfortable to reinstall Windows at any time.If you finish the Registration in Windows Insider Program you must proceed to enable Insider Preview Builds in your Windows 10. You can do it if 

  • Click in Start and select Settings.
  • Select Update & Security

  • From the right side Select Advance Options

  • In Get Insider Preview Builds click in Get Started

  • Then will be open a new Window that inform you for few things. Pls read it carefully. Click Next.

  • Read  carefully the Before you Confirm and if you are ready click Confirm.

  • When Finish Windows will be restarted without notify you and from now on you will login in the PC with the Microsoft Account that you have use to Register in Windows Insider Program.
  • When you login go again in Start - - -> Settings - - - > Updates & Security.
  • Select Advance Options
  • Click in Get Started.

  • Select the Microsoft Account and click Close.

  • Now you have start the Insider Preview Builds. Choose between Slow and Fast and you are ready to receive all the new builds,updates and Apps that are in Beta State yet.


Activate Developer Mode

Once you are sure use the correct version then you must enable the Developer Mode.

  • Click in Back Button

  • Select Updates & Security

  • Select For Developers
  • Click in Developer Mode.
  • It will popup a windows that you must read and if you agree click Yes.

Enable Ubuntu Bash Shell in Windows 10

This is the final step but you must have complete the above 2 steps successful. After Register in Windows Insider Program and Enable Insider Preview Builds you must follow the steps to enable Ubuntu Bash Shell.

  • Right Click in Start and select Control Panel.

  • Select Programs and Features.

  • From the left side click in Turn Windows Features on or Off

  • Go down and check the Windows Subsystem for Linux(beta). Click OK

  • Wait to finish the installation.


This is it. Very exciting news from Windows. I'm very curious to see what new will have in the future for Windows 10.

Already have enable the Ubuntu bash shell in your WIndows10? I would like to hear your opinions and share it with other user in our Commented System.

CIM Instead of WMI to discover monitor info

$
0
0

Windows Server 2012 and Windows 8.1 brings new set of Cmdlets to manage any Server or device that complies with CIM. Before months i wrote an article Use WMI with Powershell to Discover Monitor Information but it seems that WMI is deprecated  and new CmdLets like CIM use instead of WMI. Also after publish the article related to WMI lot of users complaint that can get this info with better way which is the CIM.

Today I will explain how can Discover Monitor Information from Devices or Servers with CIM instead of WMI and how easy is to migrate any script that you have create with WMI related on Discover Monitoring info in CIM.

Before begin i would like to explain what means the letters CIM. CIM = Common Information Mode and base on the explanation in  Scripting Guy Blog "provides a common definition of management information for systems, networks, applications and services, and allows for vendor extensions. CIM's common definitions enable vendors to exchange semantically rich management information between systems throughout the network."

Now i will ask the question why to use CIM and not continue with WMI?

Because

  • WMI don't provide first class PS Experience,
  • There are issues with serializing a WMI object,
  • there is no concept of session reuse and WMI object has weird looking property names (like __Server)
  • And more more in Windows Powershell Blog

Instead with CIM can

  • Make CIM a first class citizen of PS
  • Should be able to  manage any CIM+WsMan device
  • Support down-level machines


Now it's time to proceed and DIscover Monitoring Info from Devices. Read the article Use WMI with Powershell to Discover Monitor Information to understand how will proceed.

  • Check if can connect remotely with Powershell in devices that you want to get Monitoring Info. Read the How to Manage PC or Servers Remotely with Powershell
  • Let's take the  the Hard Disk Info. Type the command
    Get-CIMInstance Win32_Logicaldisk -filter "deviceid='C:'" -Computer ktzouvaras

  • Take the Cpu Type of the Workstation
    Get-CIMInstance Win32_processor  -Computer ktzouvaras

  • What about RAM?
    Get-CIMInstance Win32_physicalmemory  -Computer ktzouvaras

  • Do you get lot of Info?
    Get-CIMInstance Win32_physicalmemory   -Computer ktzouvaras | Select Capacity.

  • These are some of the commands that you can run. If you want to migrate any script with WMI to CIM you can go in Windows PowerShell Blog and open the Article Introduction to CIM Cmdlets go down and found the 7. Easy migration from WMI cmdlets.
  • In the article that i wrote before months Use WMI with Powershell to Discover Monitor Information i have publish a small script to get discovery info from a PC without need to run multiple commands.
  • Let's take a look. This is the old script

    -------------------------------------------------------------------------------------------------------------------------------------------------------------

$bios = Get-WmiObject win32_OperatingSystem -ComputerName localhost | Select PSComputername
$Proc = Get-WmiObject Win32_processor -ComputerName localhost | Select-Object -First 1
$memory = Get-WmiObject Win32_physicalmemory -ComputerName localhost
$system= Get-WmiObject Win32_ComputerSystem -ComputerName localhost
$localdisk=Get-WMIObject Win32_Logicaldisk -filter "deviceid='C:'" -ComputerName localhost

$Object = New-Object PSObject -Property @{
ComputerName           = $proc.SystemName
Model                  = $system.Model
'Processor Number'    = $system.NumberOfProcessors
'Processor Name'      = $proc.name
'Logical Processeur'  = $system.NumberOfLogicalProcessors
'RAM (GB)'            = $system.TotalPhysicalMemory / 1GB -as [int]
'Used RAM slot'       = $memory.count
'Local Disk c'        = $localdisk.size / 1GB -as [int]
}

Write-Output $Object

----------------------------------------------------------------------------------------------------------------------------------------------------------------
         

  • Change the command Get-WmiObject  with Get-CIMInstance and save it.

         -------------------------------------------------------------------------------------------------------------------------------------------------------------

$bios = Get-CIMInstance win32_OperatingSystem -ComputerName localhost | Select PSComputername
$Proc = Get-CIMInstance Win32_processor -ComputerName localhost | Select-Object -First 1
$memory = Get-CIMInstance Win32_physicalmemory -ComputerName localhost
$system= Get-CIMInstance Win32_ComputerSystem -ComputerName localhost
$localdisk=Get-CIMInstance Win32_Logicaldisk -filter "deviceid='C:'" -ComputerName localhost

$Object = New-Object PSObject -Property @{
ComputerName           = $proc.SystemName
Model                  = $system.Model
'Processor Number'    = $system.NumberOfProcessors
'Processor Name'      = $proc.name
'Logical Processor'  = $system.NumberOfLogicalProcessors
'RAM (GB)'            = $system.TotalPhysicalMemory / 1GB -as [int]
'Used RAM slot'       = $memory.count
'Local Disk c'        = $localdisk.size / 1GB -as [int]
}

Write-Output $Object

----------------------------------------------------------------------------------------------------------------------------------------------------------------

This is only simple examples that i write for now. In the future i will go more deep with CIM-Instance and publish more examples that can automate your tasks. I hope to help you and give you something more today in powershell.

If you have something to say I would like to hear your opinions and share it with other user in our Commented System.

Have a nice weekend !!!! 


Use Powershell to export Reports from Active Directory

$
0
0

Powershell today is one of the most powerfull tool for IT Pro,System Admins for lot of tasks. One of tasks that has help me a lot is a quick reports that can export from my enviroment in CSV Files and use it to easy found what i want ot give it to my Manager for any kind of Review.

Today i will focus in Export any info from Active Directory like Computers , Users, Contacts and any attributes of them like Name, Operating System , emailaddresses and save it in Csv for further use.

So let's start

  • If you use Powershell Version prior to 3 you must install manual the Module of Active Directory. From version 3 and after the module autload when run the cmdlets

    Import-Module ActiveDirectory

I will use the following scenarions to export Reports from Active Directory in Csv file or only print in Screen . I have in Bold the commands that you must change.

  • We need to find how many contacts has in Active Directory with Name,Address and X500 Address.

Get-ADObject -LDAPFilter "(objectClass=person)" -SearchBase "OU=Contacts,DC=askme4tech,dc=local" -properties name,mail | select name,mail | export-csv "c:\powershell-reports\contacts.csv"

  • We need to find the total numbers of PC'S and What Operating System Use

Get-ADObject -Filter { OperatingSystem -NotLike 'Windows Server*' } -properties name,operatingsystem |select name,operatingsystem | export-csv "c:\powershell-reports\workstations.csv"

  • We need to found the Service Pack of every WorkStation

Get-ADObject -Filter { OperatingSystem -Like 'Windows Server*' } -properties name,operatingsystem,operatingsystemservicepack |select name,operatingsystem,operatingsystemservicepack | export-csv "c:\powershell-reports\Servers-Servicepack.csv"

  • We need to find how many Servers we have and What Operating System Use

Get-ADObject -Filter { OperatingSystem -Like 'Windows Server*' } -properties name,operatingsystem | select name,operatingsystem | export-csv "c:\powershell-reports\workstations.csv"

  • We need to found how many users have and which Organization Unit located

Get-ADUser -SearchBase "DC=askme4tech,dc=local" -Filter * -properties name,distinguishedName | select name,distinguishedName | export-csv "c:\powershell-reports\users.csv"

  • We need to found the Service Pack of every Windows Server

Get-ADObject -Filter { OperatingSystem -NotLike 'Windows Server*' } -properties name,operatingsystem,operatingsystemservicepack |  select name,operatingsystem,operatingsystemservicepack | export-csv "c:\powershell-reports\workstations-ServicePack.csv"


These commands are very usefull when you want something quick and up to date. Also for IT Pro and System Admins that are in new job without has any documentation from Previous IT can help a lot to take am image of Active Directory enviroment.

Now it's your turn to share what you know and how can export your Reports that you need from Active Diretory quick and up to date. Share it in our Commented System and discuss it with other IT Pro.

Have a nice weekend !!


Protect File Servers from Ransomware

$
0
0

Ransomware is one of the most dangerous mailware today.Every day i hear for infections of File Servers with Ransomware and IT to try find the source and prevent more damage in the enviroment.New types of Ransomware born every day and the protection it is very difficult task. Base of Trend Micro << Ransomware is a type of malware that prevents or limits users from accessing their system. This type of malware forces its victims to pay the ransom through certain online payment methods in order to grant access to their systems, or to get their data back. Some ransomware encrypts files (called Cryptolocker). Other ransomware use TOR to hide C&C communications (called CTB Locker).>>.

Symantec very frequency announce for new types of Ransomware like http://www.symantec.com/connect/blogs/locky-ransomware-aggressive-hunt-victims.

In this Article i will share in IT Community a very interesting solution that found in Microsoft Technet Gallery and protect File Servers from any type of Ransomware that exist until today. 

Let's start to prevent the Damage!!

For the solution will use File Server Resource Manager (FSRM) and Powershell.

Install File Server Resource Manager

  • Open  Server Manager
  • Click Add  Roles and Features.

  • Click Next in Welcome Screen.

  • Select Role-based or feature based installation.Click Next.

  • Use the default options and click Next.

  • Expand File and Storage Services - - > File and iSCSI Services.

  • Select File Server Resource Manager.Click Add Features and Click Next.

  • Don't change anything and click Next.

  • Click Install to start the Installation and Wait to Finish.


Create FileScreen Group

After Finish the Installation now will proceed to create the Template that will use in File Server  Resource Manager to block all known extensions of Ransomware. I found the Template from https://gallery.technet.microsoft.com/scriptcenter/Protect-your-File-Server-f3722fce  which Tim Buntrock has do a very good Job with this Powershell Script.

For Windows Server 2008
-----------------------------------------------------------------------------------------------------

filescrn filegroup Add /filegroup:Ransomware_Extensions 
/Members:"*.k|*.encoderpass|*.key|*.ecc|*.ezz|*.exx|*.zzz|*.xyz|*.aaa|*.abc|*.ccc|*.vvv|*.xxx|
*.ttt|*.micro|*.encrypted|*.locked|*.crypto|_crypt|*.crinf|*.r5a|*.xrtn|*.XTBL|*.crypt|*.R16M01D05|
*.pzdc|*.good|*.LOL!|*.OMG!|*.RDM|*.RRK|*.encryptedRSA|*.crjoker|*.EnCiPhErEd|*.LeChiffre|
*.keybtc@inbox_com|*.0x0|*.bleep|*.1999|*.vault|*.HA3|*.toxcrypt|*.magic|*.SUPERCRYPT|*.CTBL|
*.CTB2|*.locky|HELPDECRYPT.TXT|HELP_YOUR_FILES.TXT|
HELP_TO_DECRYPT_YOUR_FILES.txt|RECOVERY_KEY.txt|HELP_RESTORE_FILES.txt|
HELP_RECOVER_FILES.txt|HELP_TO_SAVE_FILES.txt|DecryptAllFiles.txt|DECRYPT_INSTRUCTIONS.TXT|I
NSTRUCCIONES_DESCIFRADO.TXT|How_To_Recover_Files.txt|YOUR_FILES.HTML|YOUR_FILES.url|
Help_Decrypt.txt|DECRYPT_INSTRUCTION.TXT|HOW_TO_DECRYPT_FILES.TXT|ReadDecryptFilesHere.txt
|Coin.Locker.txt|_secret_code.txt|About_Files.txt|Read.txt|ReadMe.txt|DECRYPT_ReadMe.TXT|DecryptAllFiles.txt|
FILESAREGONE.TXT|IAMREADYTOPAY.TXT|HELLOTHERE.TXT|READTHISNOW!!!.TXT|SECRETIDHERE.KEY
|IHAVEYOURSECRET.KEY|SECRET.KEY|HELPDECYPRT_YOUR_FILES.HTML|help_decrypt_your_files.html|
HELP_TO_SAVE_FILES.txt|RECOVERY_FILES.txt|RECOVERY_FILE.TXT|RECOVERY_FILE*.txt|HowtoRESTORE_FILES.txt|HowtoRestore_FILES.txt|
howto_recover_file.txt|restorefiles.txt|howrecover+*.txt|_how_recover.txt|recoveryfile*.txt
|recoverfile*.txt|recoveryfile*.txt|Howto_Restore_FILES.TXT|help_recover_instructions+*.txt|_Locky_recover_instructions.txt"

-----------------------------------------------------------------------------------------------------

For Windows Server 2012
-----------------------------------------------------------------------------------------------------

New-FsrmFileGroup -Name "Ransomware_Extensions"–IncludePattern @("*.k","*.encoderpass","*.key","*.ecc","*.ezz","*.exx","*.zzz","*.xyz","*.aaa","*.abc","*.ccc","*.vvv","*.xxx","*.ttt","*.micro","*.
encrypted","*.locked","*.crypto","_crypt","*.crinf","*.r5a","*.xrtn","*.XTBL","*.crypt","*.R16M01D05","*.pzdc","*.good","*.LOL!","*
.OMG!","*.RDM","*.RRK","*.encryptedRSA","*.crjoker","*.EnCiPhErEd","*.LeChiffre","*.keybtc@inbox_com","*.0x0","*.bleep","*.
1999","*.vault","*.HA3","*.toxcrypt","*.magic","*.SUPERCRYPT","*.CTBL","*.CTB2","*.locky","HELPDECRYPT.TXT",
"HELP_YOUR_FILES.TXT","HELP_TO_DECRYPT_YOUR_FILES.txt","RECOVERY_KEY.txt","HELP_RESTORE_FILES.txt",
"HELP_RECOVER_FILES.txt","HELP_TO_SAVE_FILES.txt","DecryptAllFiles.txt","DECRYPT_INSTRUCTIONS.TXT","INSTRUCCIONES_DESCIFRADO.TXT",
"How_To_Recover_Files.txt","YOUR_FILES.HTML","YOUR_FILES.url","Help_Decrypt.txt","DECRYPT_INSTRUCTION.TXT","HOW_TO_DECRYPT_FILES.TXT",
"ReadDecryptFilesHere.txt","Coin.Locker.txt","_secret_code.txt","About_Files.txt","Read.txt","ReadMe.txt","DECRYPT_ReadMe.TXT","DecryptAllFiles.txt","FILESAREGONE.TXT",
"IAMREADYTOPAY.TXT","HELLOTHERE.TXT","READTHISNOW!!!.TXT","SECRETIDHERE.KEY","IHAVEYOURSECRET.KEY","SECRET.KEY","HELPDECYPRT_YOUR_FILES.HTML",
"help_decrypt_your_files.html","HELP_TO_SAVE_FILES.txt","RECOVERY_FILES.txt","RECOVERY_FILE.TXT","RECOVERY_FILE*.txt","HowtoRESTORE_FILES.txt",
"HowtoRestore_FILES.txt","howto_recover_file.txt","restorefiles.txt","howrecover+*.txt","_how_recover.txt","recoveryfile*.txt","recoverfile*.txt","recoveryfile*.txt",
"Howto_Restore_FILES.TXT","help_recover_instructions+*.txt","_Locky_recover_instructions.txt")

-----------------------------------------------------------------------------------------------

So now we have create the FileScreen Group with name Ransomware_Extensions that will be use in next Step.

Create New FileScreen

  • First of all must configure FSRM to send email notifications  so open File Server Resource Manager.
  • Right click in File Server Resource Manager and select Configure Options.

  • Fill the SMTP Server and Default Administrator Recipients. Click the Button Send Test Email to verify that receive emails from FSRM.

  • Click in Tab Notification Limits and change Event Log Notifications (minutes) and Command Notifications(minutes) to 0. Click OK

  • Right Click in File Screens and Select Create File Screen.

  • Select the File Screen Path which is the Folder or Drive to monitoring for any incident base on the Ransomware_Extensions Group  that create in previous Steps.
  • Select Define Custom file screen Properties and click in Button Custom Properties

  • In Screening Type select Active Screening: ..............
  • In File Groups select Ransomware_Extensions. This is the File Group that created with the Powershell in Create FileScreen Group

  • Go in Tab Email Notifications and check Send e-mail to the following Administrators and Send e-mail to the user that attempted to save and unauthorized file.

  • Click in Tab Command.
  • Select Run this command or Script and browse to find C:\Windows\System32\cmd.exe
  • In the command arguments type the following but change the folder path which have save and extract the RansomwareBlockSmb.zip
    /c "C:\Script\StartRansomwareBlockSmb.cmd"
  • In the Command Security select the Local System.
  • Click OK to create the File Screen.


Verify that the File Screen works

Now we have complete the configuration and suppose that when someone infected with Ransomware and start to encrypt files will be deny to change or create any file with extensions that use Ransomware until today. But it's better to do a test to check if working.

  • Open the folder that you have enable the file screen and create a Word Document. Change the extension of .docx to .locky or any other extension which included in Template and check the results.
  • If the configuration is correct you will not allow to change the file wit a promote window

  • and you will receive an email notification like.
    <<User ktzouvaras attempted to save E:\Users\Tzouvaras\Public\Test.locky to E:\ on the FS1 server. This file is in the "Ransomware_Extensions" file group, which is not permitted on the server.>>


Some of you maybe ask and what about new types and extensions of Ransomware. How can protect? This is he disadvantage but at least you are protected from all the Ransomware attacks that already exists. It's very important and you will prevent the damage from lot of attacks if will happen.

Most of the companies has a Spam Filtering Solution but this is a second Layer of Protection in case of something pass the filtering.

Do you have something to share related with Tansomeware? Share it in our Commented System and discuss it with other IT Pro.


Have a nice weekend!!


Generate CSR (Certificate Signing Request) - IIS 7

$
0
0

If you need an SSL Certificate your Provider will be request to upload the CSR from your Internet Information Server 7. So you must  Generate the CSR to be ready. How can do it ?


  • Open your IIS 7
  • Click in the Server Name from the left and click in Server Certificates from the righ side.

  • Click Create Certificate Request from the right side.

  • Fill all the options. The most important is the Common Name. Must be the FQDN that will have decide to use the SSL Certificate. For example if the SSL is for web site write the website name. If the SSL is for RD Gateway Server write the name that you have decide to use. For example rdg.askme4tech.com.
  • Click Next

  • Use the Microsoft RSA SChannel Cryptographic Provider and change from 1024 to 2048 the Bit length.

  • Click Browse to save the file. Click Finish.


Now you are ready to upload the CSR when requested from your Provider for the SSL Certificate.


Install and Configure Remote Desktop Gateway Server

$
0
0

Today security is the most important task in IT.For every task or Project the first think is security before proceed to completed. I wrote 3 Parts of Remote Desktop Servers Farm and  Load Balancing months ago. Now i will write how can use RD Gateway Server to connect Remotely in your LAN from the Internet more secure.

Related articles before start to Deploy Remote Desktop Gateway Server

Remote Desktop Servers Farm and  Load Balancing - Part 1

Overview

What is Remote Desktop Gateway Server and where can use it? 

Base on Microsoft from Overview of Remote Desktop Gateway

<< Remote Desktop Gateway (RD Gateway) is a role service that enables authorized remote users to connect to resources on an internal corporate or private network, from any Internet-connected device that can run the Remote Desktop Connection (RDC) client. The network resources can be Remote Desktop Session Host (RD Session Host) servers, RD Session Host servers running RemoteApp programs, or computers with Remote Desktop enabled.

RD Gateway uses the Remote Desktop Protocol (RDP) over HTTPS to establish a secure, encrypted connection between remote users on the Internet and the internal network resources on which their productivity applications run.>>

RDG Design 

There are different designs for integrating Remote Desktop Gateway Server.I don't want to analyze any architecture but  I will explain the most common that used.

RD Gateway Server inside the LAN.

Use the RD Gateway Server inside the LAN and just allow 443 port in Firewall between Internet and RD Gateway Server.. This is the simplest method but the most insecure. With RD Gateway Server provide some protection but you publish your LAN in the Internet. This method it's better to use in Lab Environment for training purposes.

RD Gateway Server in DMZ.

Create a DMZ in Firewall and move the RD Gateway Server. So can isolate the RD Gateway Server fro m your Internal Network. You must open port 443 between Internet and RDG and port 3389 between RDG and Internal Network. It's more difficult solution and must have advance experience with Firewall unless need Network Administrator to create the DMZ and the traffic between Internet-DMZ-LAN. This solution it's recommended if you want to use RD Gateway Server.

You can find more methods for the Design of RD Gateway but i will stay with these 2 most common methods. For the article i will use method 2 because it's more secure.


Install Remote Desktop Gateway Server

After decide how can integrate RD Gateway Server we must install the RD Gateway Role. 

  • Log in the Server that use as RD Gateway Server
  • Click in Server Manager.
  • Click Add Roles
  • Click Next
  • Select Remote Desktop Services. Click Next
  • Check Remote Desktop Gateway and click in Add Required Role Services that need to proceed in next step.Click Next

  • For now select Choose a certificate  for SSLencryption later. But it's required to install an SSL Certificate to work with RD Gateway Server.

  • Select Now to Create authorization Policies.Click Next.
    With Authorization Policies in RD Gateway Server you can choose which user can connect to this RD Gateway Server.


  • For now allow only Administrators and will be choose after installation the user Groups that want to connect to this RD Gateway Server. Click Next.

  • Use the default name for RD CAP or change it and click Next

  • Use the default name for RD RAP or change it as you want. Select Allow users to connect to any computers in the Network. Click Next

  • You can see a quick Overview for Network Policy and Access Services. Click Next.

  • The selection of Network Policy Server is check by default. Click Next

  • Another one quick overview for IIS. Click Next.

  • Click Next with the default options.

  • This step is just a Confirmation for your Options. As you can see you have 1 warning which say that RD Gateway it's not operate without Certificate. Click Install

  • Wait until finish. 
  • After finish the installation do  Restart.

Install SSL Certificate in RD Gateway Server

The first step after finish the installation to be functional RD Gateway Server is to install an SSL Certificate. You can create a self sign Certificate to use it only from your LAN. I recommend to use it and do tests from your LAN until configure it and can connect through RD Gateway. 

Before install the SSL Certificate must request CSR from your IIS. Find how can do it in Generate CSR (Certificate Signing Request) - IIS 7

But RD Gateway Server will use it if you have users out of your company and must be connect from the Internet. So you must find one provider and buy an SSL Certificate. You need a Basic SSL Certificate and not any wildcard or more advance. To be honest i search lot until find what type of SSL Certificate must be install for RD Gateway.

  • Open RD Gateway Manager
  • Right Click in Server and select Properties.

  • Select SSL Certificate Tab and click Import Certificate.

  • Select the SSL Certificate that you have install before and click Import.

  • If the SSL Certificate imported you can see all the details of the SSL Certificate.

Configure  (RD CAPs) 

After buy and install SSL Certificate you must configure RD CAP.  This Policy allow specific user groups to connect in RD Gateway Server base of your selection.

  • Start - - -> Administrative Tools - - -> Remote Desktop Services - - > Remote Desktop Gateway Manager.
  • Expand RDG - - > Policies and you will find the Connection Authorization Policies and Resource Authorization Policies.
  • Click in Connection Authorization Policies and double click in RD_CAP.

  • Select Requirements Tab.
  • In User group (membership) define which groups you want to allow. It's required and must be Groups and not individual Users. Unless you can't connect.

  • When finish Click OK.

Configure (RD RAPs) 

RD RAP Policy us also required and allow network resources that can be connect the User Group through RD Gateway Server.

  • Start - - -> Administrative Tools - - -> Remote Desktop Services - - > Remote Desktop Gateway Manager.
  • Expand RDG - - > Policies and you can will find the Connection Authorization Policies and Resource Authorization Policies.
  • Click in Resource Authorization Policies and double click in RD_RAP.

  • Select User Groups Tab. Specify the User groups. Probably will be the same as in RD CAP Policy.
  • Select Network Resource and decide in which Computers wants users to connect. If you don't have any Restriction check Allow users to connect to any network Resource.

  • If you want users to connect in specific Servers or PC check in Select an existing RG Gateway Manage group or create new one.

  • Click Browse. Click Create New Group​.

  • Type the name. Select Network Resources Tab.Add the IP Address of the Server or PC. Click OK and OK.

  • When finish Click OK.

Verifying RD Gateway Functionality

It's time to verify that the RD Gateway Server works. Go in client PC. 

  • Open Remote Desktop Connection.
  • Select Show Options.

  • Select Advance Tab
  • Click in Settings.

  • Select Use the RD Gateway Server Settings.
  • Type the name that you have decide to give in A Records of your DNS(Same name must has the SSL Certificate). For example rdg.askme4tech.com.
  • Click OK.

  • Select General Tab
  • Type the internal IP Address of your Server or PC and click Connect

  • Write the appropriate credentials and if all the settings are correct will be connect.

  • If not then you have lot of configuration to check where is the problem.
  • Most of them are:
  1. Be sure that you have type the right address and name in Records of your DNS. (If you aren't sure ask your provider to check it). Also you can open cmd and ping the name that have give in A Records and check if you return the right IP Address. It doesn't matter if Time out because it's in the Internet and it's Normal
  2. Check your Firewall Settings. If the RD Gateway Server is in the LAN (which not recommended) you must open port 443 only to your RD Gateway Server.
  3. If your RD Gateway Server is on DMZ then read the article to check your ports that must be open 
    https://blogs.msdn.microsoft.com/rds/2009/07/31/rd-gateway-deployment-in-a-perimeter-network-firewall-rules/
  4. Check the RD RAP and RD CAP Policies. At least must have the User Group that allow to connect in the RD Gateway Server.
  5. If you use Local Users must be created also in RD Gateway Server with the same usernames and passwords.


To be honest the configuration of DMZ in the Firewall it's very very difficult if you don't have do it again. I spent 3 days in y Work to configure properly and allow to communicate DMZ with the appropriate Servers in the Inside Network in appropriate Ports.

Windows Sysprep Tool for Virtual Machines

$
0
0

Sysprep is a Microsoft tool  prepares an installation of Windows for duplication, auditing, and customer delivery. Most of you are familiar with Sysprep and has use it lot of times. When you are setup a Windows VM you need to install softwares, drivers, maybe some configuration in firewall, enable Remote Desktop , install critical patches and who know's what else base on every IT requirements. All these takes lot of time every time tha you must insall a new VM.

If you don't use MDT (Microsoft Deployment Toolkit) which is very good tool for those that you don't have hear again you can use a sysyprep with a switch /mode:vm

The command-line option /mode:vm it's new command and can use it from Windows 8,Windows Server 2012. The command generalize VHD so you can deploy it as VHD or VHDX in the same HYPERV Host. With simple words you can use the same VHD or VHDX File for the first Boot for different VM's.

Today i will explain how can use Sysprep with the The command-line option /mode:vm and automate you Job.

So Let's start.

  • Create new VM with Windows 8.1 or Windows Server 2012
  • Install softwares that you want.
  • Install Windows Updates .
  • Do your configurations base on your requests like enable Remote Desktp Connectio, Configure Windows Firewall or any other configuration.
  • Run As Administrator the cmd
  • Run the following command
    sysprep.exe /oobe /generalize /shutdown /mode:vm

  • After finish and shutdown the PC backup the VHD file or copy to another location
  • Create a new VM.
    Create Virtual Machine in Windows 8.1 with HYPER-V
  • Attach the VHD file in the new VM.
  • As you can see it starts again the first startup configuration as new installation.

What exactly doing the /mode:VM? Boost the perfomance and time for the virtual machine for the first startup and installation.

The command-line option /mode:vm can use it only in Virtual Machines in different technologies of Virtualization like HYPERV,Xen,VMWARE.,ESX.

Can't use the VM after sysprep in differnt HYPERV Host with different hardware.

How usefull found this tip? Will be using this command? Let's share your opinion or experience in our commented system.


Create Failover Plan that will Work when you Need - Part 1

$
0
0

Failover is very important for all IT Pro and is High Importance Project that must have been complete and do periodical checks that works without problems. What is Failover? Maybe all knows what is mean but i would like to repeat again. A general term that i found in Wikipedia  is <<In computing, failover is switching to a redundant or standby computer server, system, hardware component or network upon the failure or abnormal termination of the previously active application,[1] server, system, hardware component, or network. Failover and switchover are essentially the same operation, except that failover is automatic and usually operates without warning, while switchover requires human intervention.>>


Install Veeam Backup & Replication

  • Download Veaam Backup & Replication from Veaam Site.
    https://www.veeam.com/downloads.html
  • You must create an account to proceed with the download.
  • Extract the ISO file
  • Open the extracted folder and click in Setup
  • Click in Veeam Backup & Replication icon

  • Start with Welcome Wizard. Click Next.

  • Select the I agree ...... and click Next.

  • If you don't have buy any license you can use it as Trial.If you have License click Browse to locate the license file and after click Next. If you want to use it as Trial just click Next.

  • Don't change anything and click Next.

  • Here you can see that missing some features for the installation. Click Install and wait to install all the missing features. When finish click Next. This step it's not default for all users because someone maybe has all the missing features installed. So will be do the check and proceed with the next step.

  • Just the Default Configuration. It's better don't change anything and click Install.

  • Wait to finish the installation.


Configure Veeam Backup & Replication

After finish the installation we must configure Backup Repositories and Hosts to identify Virtual Machines.

  • After finish the installation click in the icon of Veeam Backup & Replication.
  • Click Connect to open the Console.
  • Select Backup & Infrastructure

  • Right click in Managed Servers.
  • Select Add Servers.

  • Base on your infrastructure select the Server that you must Add VMware,HYPERV or any other Server that you have. Have in mind that you must add only the Host Servers and will find your Virtual Machines. You can't add standalone Virtual Machine.

  • Add the Production Host Server and Disaster Host Server because we will use it in the next Task when create the Replication Job.

Create Replication Job

  • After configure the Backup Infrastructure we can proceed to create a new Replication Job.
  • From the toolbar in Home Tab  select Replication Job.
  • Type the name that you prefer for the Replication Job
  • Disaster Recovery Site will be in different network and most of the times has different IP Subnet.Then it's very important to click in Different IP Addressing scheme (enable re-ip). The specific option will be undertake the network mapping between Server in the Disaster Recovery Site and your network. For the specific option and configuration will be discuss with more details in 2nd Part. But it's very important to select the option because if you don't  then you will have the Server in your Disaster Recovery Site but without can use it when must use Failover and transfer all the workload.Click Next.

  • Click Add and select the Server that you want to Replicate. Click Next.

  • In Host or Cluster click Choose and select the Host in the Disaster Recovery Site. Then automatic will be fill and the other options like Resources ,VM Folder and DataStore. Click Next.

  • Now will be configure the network mapping. Click Add.

  • In the IP Address type the IP Subnet of your Network and in the last number add * if you want to specify a range of IP (Don't use 0). For example 192.168.1.*
  • In the Target VM do the same with the IP Subnet of the Server in the Disaster Recover Site.
  • If you don't want to specify range then type the specific ip address of the Source VM and of the Target VM. 
  • Add the Default Gateway of your Disaster Recovery Site.
  • Add the DNS Servers of your Production Environment..

  • Specify the Repository of Metadata files. Leave the default.
  • Specify prefix and restore points to keep it in Replication Server. I will reduce from 7 to 3. I don't need lot of restore points just more that 2 in case of something going wrong with one of restore points. Click Next.

  • Don't change anything. Click Next and will discuss in Part 2 for the Target Proxy.

  • For Replication you don't need application aware-processing. So click Next.

  • Click Run the job automatically and schedule the job.Click Create.

  • Click Finish.

Now the job is ready to run in schedule time. If it's the First Server it's better to do a test and start Run Manual to verify that all is ok. Of course Run the Job in non working hours because will be reduce the performance.

Create Failover Plan that will Work when you Need - Part 2

$
0
0

Failover is very important for all IT Pro and is High Importance Project that must have been complete and do periodical checks that works without problems. Today i will explain in depth the last part  how can start the Failover Server and Failback to the Production again without issues and downtimes.


Create Target Proxy 

Veeam recommends to have at least one Backup Proxy in source Host and one Backup Proxy in Disaster Site. It's not required but can improve the performance in Replication and Failover Process. Believe you need it when you must start a Failover for a Server.

Now let's explain how can configure it.

  • Before start the configuration you must setup a new Server in the Disaster Recovery Site to use it as Target Proxy.
  • When you finish open Veeam Console from the Replication Server in Production Environment
  • Select BACKUP INFRASTRUCTURE
  • Select Backup Proxies

  • Right click and select Add VMWARE or HYPERV base on your infrastructure. Now will use VMWare Backup Proxy.
  • Click button Add New.

  • Type the Ip Address from the Server that setup in the first Setup. Click Next.

  • Select credentials that use for the specific server. If you don't have it select Manage Accounts and add the new credentials

  • When finish with the new credentials click Next 
  • Wait until verify credentials and Server Ip Address.
  • Click Next to start the Installation.

  • Wait to Finish and click Finish
  • Click Next without change anything.

  • Wait until Validate Server.
  • Now here you can create Network Traffic Rules 

  • ...........
  • Click Finish

Now we finish with the installation of Backup Proxy in Disaster Recovery Site. You can find the new server in the Backup Proxies

  • Go BACKUP & REPLICATION
  • Select Replications
  • Right click in Replication Job and select Edit
  • Click in Data Transfer
  • Click Choose in Source Proxy

  • Select Use the selected Backup proxy Servers only
  • Tick only in the Backup Proxy of your Production Environment. In this case i have Backup Proxy in the same Server that use for the Replication.
  • Click Ok.

​​

  • Click Choose in Target Proxy
  • Select Use the selected Backup proxy Servers only
  • Tick only in the Backup Proxy of your Disaster Recovery Server. In this case the backup proxy server that install before. Click OK

  • Click Finish

This is the configuration that need to use Source and Target Proxy for better performance. Start the job and check the logs to identify that use both backup proxy servers.


Configure DNS Entries

Until now we have configure Veeam for Replication Jobs, already have Replicate successful our Servers in Disaster Recovery Site. But let's think about that the Disaster Recovery Site has different IP Subnet and in the Part 1 discuss how can enable Re-IP in Veeam for network mapping. 

But do you have think how  can resolve DNS entry of the Failover Server? For example in Outlook we use the Server Name of Exchange Server. How can resolve the DNS for the Failover Server if it is in different IP Subnet. So the time that you will need it you will not use it because Outlook can't resolve the new IP Address of the Failover Server. 

The solution is to use round-robin. Find more details in https://technet.microsoft.com/en-us/library/cc787484(v=ws.10).aspx.

To enable round-robin must configure 2 options

  1. Make sure that DNS Server has enable round-robin
  • Login in the Domain Controller
  • Open DNS Server
  • Right Click in Server Name and select Properties.
  • Go in Advance Tab and verify that the Enable round robin is checked. If not check it.

  1. Create second entry in Forward Lookup Zones with the same Computer name of the Server with the IP Address that has in Disaster Recovery Site

Start Failover

Now it's time to do a test and check if Failover works without problems

  • Because this is test scenario be sure that the production Server is power off.
  • Open Veeam Console
  • Select BACKUP & REPLICATION
  • Go in Replicas - - .> Ready

  • Right click in the Server from the right side that you must start Failover and select Failover Now
  • As you can see you have the last Restore Point of Replication. If you want different Restore Point click in button Point and select from available Restore Points.

  • Click Next. Write the Reason if you want.It's an optional

  • Click Finish.
  • Monitoring the progress until start Failover. As you can see in the printscreen.Now the Server change Ip Address because we use Re-IP when create the Job in Part 1.

  • If Failover start ping the Server with the server name and check  the ip address which return.

  • If can't ping then check your DNS Entries or wait a minute to update DNS.


Failback To Production

The Failover start and already all users connected in the specific user. As IT the priority is to resolve the problem with the problem Server in your Production Environment.

After hours the Production Server it's ready to be online again. How can face the gab between Failover data and probably last backup that you have restore in your Production Server?

Here comes the Failback to Production which transfer only the changes that will find between Failover Server and Production Server. Of course this job must be done after working hours.

  • Open Veeam Console
  • Select BACKUP & REPLICATION
  • Go in Replicas - - .> Ready - - >Active
  • Right click in the Server and select Failback to Production

  • Click Next

  • Select the option that you want. Suppose that we do Failback to the original VM. But the important option is to the Backup Proxies. Click in the bottom Pick backup Proxies for Data Transfer

  • Click Choose in DR Site Proxy
  • Select Use the selected Backup proxy Servers only
  • Tick only in the Backup Proxy of your Disaster Recovery  Click OK.

  • Click Choose in Prod Site Proxy
  • Select Use the selected Backup proxy Servers only
  • Tick only in the Backup Proxy of your Production Environment. In this case i have Backup Proxy in the same Server that use for the Replication.
  • Click Ok.

  • Click Next
  • Click Finish.
  • Check the progress until Complete successful
  • When the Failback complete successful click Close
  • Right click again in the Server and select Commit Failback.

  • Click Yes in the Question and wait to finish.

Now the Failover Server Failback to the Production environment with all the changes that has the Failover Server from the time that start until now.

Undo Failover

Let's say that you don't need anymore Failover with new changes because just check the Failover Plan if working.

  • Open Veeam Console
  • Select BACKUP & REPLICATION
  • Go in Replicas - - .> Ready - - >Active
  • Right click in the Server and select Undo Failover.

  • Monitoring the Logs until completed successful


Here we finish with the second and last Part. This is a method that can use in your environment to have a Failover Plan ready and use it when you will need it. 

I hope to find interesting and helpfully these 2 articles.

Do you have something to say. Write down in our commented system.


Sysprep and Capture Task Sequence failed in MDT 2013

$
0
0

Last week i decide to Capture a fresh installation of Windows Server 2012 R2 with Last Windows Updates and Antivirus. Because It takes me lot of time every time that must be install new Server. 

The configuration to capture Windows Server 2012 in MDT 2013 it's ready. I have explain step by step in How to Capture Windows Image using MDT 2013 how can do it. So i start the proccess to capturing the Windows Server 2012 R2.

Suddenly After 5 minutes i get an error and the Capturing Stopped. The error was 


<<Details … 
ZTI ERROR - Unhandled error returned by LTIApply: Not found (-2147217406 0x80041002)
Litetouch deployment failed, Return Code = -2147467259 0x80004005 
Failed to run the action: Apply Windows PE.
Not found (Error: 80041002; Source: WMI) 
The execution of the group (Capture Image) has failed and the execution has been aborted.
An action failed.
Operation aborted (Error: 80004004; Source: Windows)
Failed to run the last action: Apply Windows PE. Execution of task sequence failed.
Not found (Error: 80041002; Source: WMI)
Task Sequence Engine failed! Code: enExecutionFail 
Task sequence execution failed with error code 80004005
Error Task Sequence Manaqer failed to execute task sequence. Code 0x80004005??


Open BDD.Log file for more details and see the following errors.If you arem't familiar with MDT 2013 and Logs read the article Enable Deployment Logs for Troubleshooting in MDT 2013 to understand how can enable and where found Logs to troubleshoot easier the errors.

The error in image it's the following:

Return code from command = 0    LTIApply    6/27/2016 7:28:34 AM    0 (0x0000)
About to run command: takeown.exe /F "C:\boot" /R /A /D Y    LTIApply    6/27/2016 7:28:34 AM    0 (0x0000)
Command has been started (process ID 2792)    LTIApply    6/27/2016 7:28:34 AM    0 (0x0000)
Return code from command = 1    LTIApply    6/27/2016 7:28:34 AM    0 (0x0000)
ResetFolder: TakeOwn for C:\boot, RC = 1    LTIApply    6/27/2016 7:28:34 AM    0 (0x0000)
ZTI ERROR - Unhandled error returned by LTIApply: Not found  (-2147217406  0x80041002)    LTIApply    6/27/2016 7:28:34 AM    0 (0x0000)
Event 41002 sent: ZTI ERROR - Unhandled error returned by LTIApply: Not found  (-2147217406  0x80041002)    LTIApply    6/27/2016 7:28:35 AM    0 (0x0000)
Command completed, return code = -2147467259    LiteTouch    6/27/2016 7:28:35 AM    0 (0x0000)
Litetouch deployment failed, Return Code = -2147467259  0x80004005    LiteTouch    6/27/2016 7:28:35 AM    0 (0x0000)


Why? I have use Capture with SysPrep in MDT 2013 lot of times with Windows 7 and Windows Server 2008. I check my configuration in MDT 2013 for errors but nothing. I try again again and the result was the same.

I start a research to find why this happened and after hour i found why MDT 2013 behaviour with this way when you try to capture Windows Server 2012.

Base on Microsoft in https://support.microsoft.com/en-us/kb/2797676 this error happened because <<  LTIApply.wsf script fails to check for the existence of the boot folder on the system partition before the script runs the takeown.exe command to change ownership on the folder. The takeown.execommand fails with a "Not Found" error if the boot folder doesn't exist. This causes the Sysprep and Capture task sequence to fail.>>

The error applies to Windows 8,8.1 and Windows Server 2012,

To resolve this error follow the steps

  • Open C:\Program files\Microsoft Deployment Toolkit\Templates\Distribution\Scripts\ from the Server which has install MDT 2013
  • Find and open  the file LTIApply.wsf

  • Locate the Copy bootmgr and in the next line copy the following line
    If not oFSO.FolderExists(sBootDrive & "\Boot") then oFSO.CreateFolder(sBootDrive & "\Boot") End if

  • Save the file and start again to Capture the Windows Server 2012 R2,
  • The Capture will be complete successfull without errors.

Of course the behaviour will be different for every user and maybe has to face another errors. 

Now it's your turn to tell us for your errors that face in Capturing or Deployment with MDT 2013. You can share through our commenting system and learn from them. Try it now.

Have a nice weekend!!


Server Manager Performance Alerts in Windows Server 2012

$
0
0

IT Professionals use Windows Server Manager to Install new Roles , Features , check the Event Logs or launch other Tools. Windows Server 2012 Server Manager has lot of changes. One of the change or betetr new feature because Windows Server 2008 it's not has the specific feature is the Perfomance Alerts that you can configure. Perfomance Alerts it's somethig different with Perfomance Counters. Don't confused.

One thing that you must know is that Perfomace Counters is far more advance of Perfomance Alerts in Windows Server Manager. Perfomance Counters is designed to show you what is going on with the Server Perfomance right now. Perfomance Alerts from Windows Server Manager is design to show you how many times the Server resource consumption level exceeded the values that will give as limit. 

Perfomance alerts can give you  longer time trends instead of Perfomance Counters that can give you second by second perfomance metrics.

In this article i will explain how can use Perfomance Alerts from Server Manager to monitoring Server Resources.

Let's Start !!!!!


  • Open the Windows Server Manager.
  • Click in Local Server and scroll down.

  • Find the PERFOMANCE
  • Click in TASKS and Select Configure Perfomance Alerts.

  • Set the values that you want to Alert. In the example i set when exceed 85% of CPU and  Memory Available smaller of 400 MB then alert me.
  • Click Save

  • As you can see in Server Name the Counter Status is Off. I must enable it before start to Count.

  • Right Click in the Server Name and select Start Perfomance Counters.

  • As you can see now it's says Waiting for data ...
  • It takes some time until start to count.

  • After 15-20 you will see the graph to start
  • After some hours you will see and the alerts in the bottom.
  • OOh!!! I have 21 Memort Alerts.

  • After some hours which include and the period with Backup Jobs to run.


It's not advance Monitoring but you can have an image of your Server when exceed Server Perfomance. After you can investigate in depth for the specific hours the reason for this Perfomance.

I need to know do you have use this Lightweight Perfomance Alerts from Windows Server 2012? Do you know it before ?Let's discuss it through our commented system with other IT Pro.

Have a nice weekend !!!


Mount Server and Backup Proxy in Veeam. Where can use it?

$
0
0

Backup it's very important task for every IT from the small company with 5 users until Enterprise with hundred of users. In the market you can find thousand of Softwares for backup your data. But when you create Backup Strategy must have in mind and the Restore Process.

When the company it's small backup it's simple and backup tasks it not takes lot of time to complete because has to do with few GB's . When company grow or work in a company with lot of users then Backup start to be more complex.

Because of lot of data start to thinking for the Restore process , Replication and how much time can take to reduce the downtimes and RTO (Restore Time Object) in any case than maybe face.

As IT Professional you don't want to take offline users for long time after Server failure . 

If you use Veeam for your Backup and Replication Jobs then this article must read to explore features that maybe don't know.


Scenario 1

You have create new File Server with separate partitions for Share Folders. You must transfer all the Share folders from Old Server to New Server and the size of old Server is 350 GB. In the Old Server you have only one Partition and you can't Restore the Virtual Disk.The Restore process must be in  File Level. 

Before start to explain have in mind that it takes more time to copy multiple files from one place to another instead to copy one big file. 

DO you have try to Restore a Big folder of your File Server with lot of files in the Same File Server or in any other location. If you don't stop read and give a try to understand how much time take when you have to restore thousands files.

Here comes to take place the Mount Server. 

What is Mount Server. Veeam Mount Server route VM traffic by an optimal way, speed up restore process while reduce load on the network. 

Let's Start the Installation.

  • Mount Server must be install in Windows Server. So decide if you must install a new Windows Server or already have one that has the Role of Veeam Mount Server,
  • After decide and proceed with the Windows Server you must login in Veeam Backup & Replication Server. This is the Server that you have install the Veeam and run all the Backup Tasks.
  • Click in BACKUP INFRASTRUCTURE.
  • Click in Backup Repositories.

  • Right click in the Backup Repository that use to save Backups and select Properties.
  • From the left side click Mount Server
  • In the Mount Server click in the arrow down and select Add Server.

  • Write the Ip Address or FQDN and click Next.

  • Select the credentials that you have add in Veeam to connect in  Virtual Servers.

  • Wait the Veeam to Detect any installation. When finish click Next to start the installation.

  • Wait to finish the installation and click Next and Finish.

  • Now as you can see the Mount server has change but you get a Warning for NFS Services.

  • Click Next and you will see an overview.

  • Check Import existing backups automatically if you want it unless leave it as it and click Next.
  • Now it will start the installation of NFS Services that need to use it as Mount Server.

  • Wait to finish and click Finish.

That's it. Now you have create a Veeam Mount Server that can use to Mount your Backups and transfer in the VM faster.

How can understand that the Veeam Server use the Mount Server to Restore the Files?

  1. Start the Restore Process from the Veeam Server
  2. Right click in  one folder or file and select Restore - - ->Overwrite  to Restore a folder or file in the Original VM.
  3. Click in Show Details and find a line which say that use xxx as Mount Server. xxx must be the Mount Server that install previous.

OR

  1.  After Restore a file or folder go in the Mount Server to identify that the path C:\VeeamFLR\<name of the Backup Task> exist.
  2. Open the folder.Identify the Volume with the files that you want to restore.


Scenario 2

You have a DR Site to Replicate your Servers but the transfer speed it's very slow.

Find the full piece of Replication and how can create a good Failover Plan in previous Articles

Create Failover Plan that will Work when you Need - Part 1

Create Failover Plan that will Work when you Need - Part 2

What is backup proxy? Backup Proxy is a Server that can take the workload from the Backup Server hat sits between data source and target and is used to process jobs and deliver backup traffic. For more details you can read https://helpcenter.veeam.com/backup/vsphere/backup_proxy.html

But now let's explain individual how can create a Backup Proxy to use it in your Replication Site..

  • Before start the configuration you must setup a new Server in the Disaster Recovery Site to use it as  Backup Proxy.
  • When you finish open Veeam Console from the Replication Server in Production Environment
  • Select BACKUP INFRASTRUCTURE
  • Select Backup Proxies

  • Right click and select Add VMWARE or HYPERV base on your infrastructure. Now will use VMWare Backup Proxy.
  • Click button Add New.

  • Type the Ip Address for the Server that setup Disaster Recovery Site. Click Next.

  • Select credentials that use for the specific server. If you don't have it select Manage Accounts and add the new credentials

  • When finish with the new credentials click Next 
  • Wait until verify credentials and Server Ip Address.
  • Click Next to start the Installation.

  • Wait to Finish and click Finish
  • Click Next without change anything.

  • Wait until Validate Server.
  • Now here you can create Network Traffic Rules.
  • But i will not explain now how can use it. Just click Next

  • Click Finish

Now we finish with the installation of Backup Proxy in Disaster Recovery Site. You can find the new server in the Backup Proxies

  • Go BACKUP & REPLICATION
  • Select Replications
  • Right click in Replication Job and select Edit
  • Click in Data Transfer
  • Click Choose in Source Proxy

  • Select Use the selected Backup proxy Servers only
  • Tick only in the Backup Proxy of your Production Environment. In this case i have Backup Proxy in the same Server that use for the Replication.
  • Click Ok.

​​

  • Click Choose in Target Proxy
  • Select Use the selected Backup proxy Servers only
  • Tick only in the Backup Proxy of your Disaster Recovery Site. In this case the backup proxy server that install before. Click OK

  • Click Finish

This is the configuration that need to use Source and Target Proxy for better performance. Start the job and check the logs to identify that use both backup proxy servers.

These configurations can help you to increase speed , Reduce Recovery Time but also Backup Time that you need to complete and take the Workload of the Backup & Replication Server.

Start the configuration , create the Mount Server or Backup Proxy base on your Requirements and come back to discuss your experience with the new Backup Infrastructure.


Powershell Tool to Export Reports from Active Directory

$
0
0

As i mention lot of times in the past Powershell is an amazing tool that can do lot of things. As IT with so many tasks , so many Servers to support, HelpDesk , Security and much much more to do you can automate lot of tasks with Powershell. 

Today i don't have to publish a new Article with How To that usually do in Askme4tech.

I would like to announce the 1st tool from Askme4Tech with Power GUI which include most of the Powershell commands that i have Publish in the past related to Reports of Active Directory. 

Most recent  is Use Powershell to export Reports from Active Directory

The Powershell Tool use GUI to export Specific Reports from Active Directory without need to write and run the command but you can do it with one click.

Following i will explain what is the prerequisite how it works.

The Powershell script can run in 

  • Windows 7
  • Windows 8.1
  • Windows Server 2008,2008 R2
  • Windows Server 2012,2012 R2

Before start to use Powershell script you must have install Remote Server Administrative Tools in Windows 7 and Windows 8.1

Remote Server Administration Tools for Windows 7 with Service Pack 1 (SP1)

Remote Server Administration Tools for Windows 8.1

and enable Active Directory Module for Windows Powershell.

You can read the article which explain step by step how can Installing Remote Server Administration Tools on Windows 10 and from 4sysops How to install the PowerShell Active Directory module

After finish the installations you can run the Powershell Script.

  • When will open the GUI you will see a Windows like 

  • Include 2 Tabs
    Workstations - Reports for Workstations
    Servers - Reports for Servers
  • Has 3 Different Reports for Workstations
    OS Version = Export CSV file which include all the Computer Names and Windows OS of every Workstation in Active Directory.
    Workstation Names = Export CSV file which include all the Computer Names of every Workstation in Active Directory.
    Service Packs = Export Csv file with Computer names and Service Pack of every Workstation in Active Directory.
  • Has 3 Different Reports for Servers  which is the Same as Workstations.
    OS Version = Export CSV file which include all the Computer Names and Windows OS of every Server in Active Directory.
    Workstation Names = Export CSV file which include all the Computer Names of every Serve in Active Directory.
    Service Packs = Export Csv file with Computer names and Service Pack of every Server  in Active Directory.

This is my first Version with the most common Reports. In the future i will keep up to date the Powershell Script with more Reports to help you and automate your tasks.

You can download the Powershell Script here

Powershell to for Active Directory Reports

Extract the file with WinRar. You can download WinRAR from here and run the ADReports.exe.

I hope to find helpfully and interesting this Powershell Tool with GUI. Now it's your turn to discuss through out commented system and give  feedback and recommendations for the second version.

Have a nice weekend  !!!


How to Enable HYPER-V Enhanced Session Mode

$
0
0

HYPER-V in Windows Server 2012 has lot changes. One of them is Enhanced Session Mode. All we know that Virtual Machines don't provide any physical console that you can interact with like a physical computer.

From  my experience lot of times i need to copy/paste files from USB Disk in the Virtual Machibe and i must copy-paste in network location like a User folder, connect Remotely in Virtual Machine or from HYPER-V Host Console and open network location to copy/paste the file or folder.

With Enhanced Session Mode you can have access from the Virtual Machine in Local Devices of HYPER-V Host. With more details Enhance Session Mode allow local resources to redirected to virtual machine without need network connection. To be more specific can redirect.

  • Rich display
  • Audio
  • Printers
  • Clipboard
  • USB devices
  • Drives
  • Plug and play devices
  • Smart cards

Let's Start to explain how can enable and use the Enhance Session Mode in Windows Server 2012. 

  • Login in HYPER-V Host and open HYPER-V Manager
  • Click in HYPER-V Settings from the right side.

  • Click in Enhance Session Mode from the left side.
  • Tick in Use Enhanced Session Mode. Click OK.

  • Now connect in one of your Virtual Machines and will see a small Window to give you the option for Display configuration. Select the Dispaly configuration that prefer and click in Show Options.

  • Click in Tab Local Resurces.
  • Redirect  any device that you want in the Virtual Machine.
  • In this example i have plug-in a USB Hard Disk in Physical Server. So click in More .

  • Expand the Drivers and tick in New Volume (E) which is the USB Hard Disk.

  • Click OK and Connect
  • Login in the Virtual Machine and when open This PC i can see my USB Hard Diksk.


Enhance Session Mode it's very easy to enable it. To be honest i found this option last months and has help me a lot in different tasks like copy/paste big files.

If you have any issue to enable Enhanced Session Mode you can discuss it in our commented system and help you to resolve it.

Have a nice weekend !!!


How to Use HYPER-V Best Practice Analyzer

$
0
0

Best Practices Analyzer it’s a Server Management Tool which introduce in Windows Server 2008 R2 and included in Windows Server 2012 and Windows Server 2012 R2.

Best Practices analyzer (BPA) helps System Administrators to reduce best practices violations by scanning and reporting any violation. 

BPA comes with 74 scans to see which settings configure with the wrong way and which settings not configure at all.

System Administrators can reduce the time to search for Best Practices and recommendation of Microsoft and find a simple report with what must be done to be compliance with Microsoft Recommendations.

At the same time will keep HYPER-V Host health and productive without problems.

Today I will explain how can scan BPA and take the Report


  • Login in HYPER-V Host.
  • Open Windows Server Management
  • Click in HYPER-V from the left Side.
  • Scroll down until find BEST PRACTICES ANALYZER.

  • From the right side click in TASKS
  • Click Start BPA Scan

  • Wait until finish and find the report with  Warnings and Errors.
  • As i can see one of my HYPER-V has dynamic virtual hard disks which not recommended.
  • Difficult task but i must change it!!


IT and System Administrators wants any Server healthy without errors. This is very helpfully tool to recognize errors that maybe have without know base on Best Practices and Recommendations of Microsoft

It’s time to start and use it if not already use it. Share with other IT Pro and System Administrators issues and experiences related with BPA in our commented .

Have a nice weekend !!

Top 10 Group Policy Audit Reports with LepideAuditor Suite

$
0
0

Group Policy is a fundamental element of an organization’s security policy. Even small unwanted changes to security policies, software deployment, desktop configuration or other settings can severely impact security, systems management and compliance.

Audit reports play a major role in tracking who, what, where, and when of critical data modifications. Here are 10 most useful Group Policy audit reports in LepideAuditor Suite to help you monitor changes.

  1. Group Policy Object Modified: This report records all modifications made on Group Policy Objects.  It lists all changes in convenient and easy-to-read reports.


  2. Group Policy Object Deleted: This report displays the list of all deleted Group Policy Objects. It provides information such as "GPO Name", "Who Deleted It", "The Time It Was Deleted” and more.


  3. Audit Policy Modified: These reports display all modifications to audit policies, including account logon events, account management, directory service access, logon events, object access, policy change, privilege use, process tracking and system events.


  4. User Right Assignment Policy Modified: This audit report displays all modifications in User Rights Assignment policies for Computer Configuration. These policies include creating permanent shared objects, generating security audits, load and unload device drivers and more.


  5. Password Policy Modified: Password policy modification reports provide you with thorough information about changes to password age policy, 
    password complexity policy, password encryption policy and password history policy.


  6. All Accounts Policy Modified: All alterations to Password Policies, Account Lockout Policies and Kerberos Policies in Account Policies will be displayed in the All Accounts Policy Modification reports.


  7. Security Policy Modified: Security policy modification reports display all modifications to Account Policies, Local Policies, Event Log, Restricted Groups, System Services, Registry and other Security Policies.


  8. Network Policy Modified: This report displays all modifications in the policies of BITS, DNS Client, SNMP etc. in Network Group Policy. 


  9. Account Lockout Policy Modified: Unwanted changes to Account Lockout policies can lead to unauthorized access. Account lockout policy modification reports show changes to the account lockout policies.


  10. Interactive logon policy: This report displays changes to Interactive Logon policies such as Interactive Logon: Do not display last user name, Interactive Logon: Do not require CTRL+ALT+DEL, etc. in the Security Options.

Conclusion:
LepideAuditor Suite provides over 270 reports, including the ones mentioned in this article, to help with all manner of security, systems management and compliance challenges. The solution provides an alternative to native auditing approaches, ensuring that maintaining a pro-active auditing policy isn’t overly time-consuming, complex or costly.  


Enable Active Directory Remote Administration Tools

$
0
0

Active Directory Users and Computers it is a primary tool for every IT if works with Domain Controllers. Every time that you must change password, create new user, reset passwords, add member to Group and more tasks use Active Directory Users and Computers. 

But you know that for every request must connect in Domain Controller open Active Directory Users and Computer to do the task. With Remote Server Administrator Tools you don't need to do all these steps. Just you can connect in Active Directory Users and Computers remotely from your PC.


 Maybe lot of IT Pro already know and use Remote Server Administrator Tools but i would like to do a refresh for those that they don't know this feature.

Install Remote Server Administrator Tools

If you already has setup Remote Server Administration Tools you can proceed with the second Step

  • Base on yor Windows OS Download Remote Server Administration Tools from the following link
  1. Windows 10
    https://www.microsoft.com/en-us/download/details.aspx?id=45520
  2. Windows 8.1
    https://www.microsoft.com/en-us/download/details.aspx?id=39296
  3. Windows 7
    https://www.microsoft.com/en-us/download/details.aspx?id=7887
  • Start the Installation of WindowsTH-KB2693643-x64

  • After while you will get a Windows. Click I Accept.

  • Wait to finish the installation

  • After finish it will prompt to restart your PC.


Enable Active Directory Remote Server Administration Tools

After Restart the PC it's time to enable Remote Server Administrator Tools for Acive Directory

  • Right Click in Start and Select Control Panel.

  • Select Programms and Features.
  • Select from the left side Turn Windows Features On or Off.

  • Scroll Down and find the Remote Server Administration Tools

  • Expand Remote Server Administration Tools - - -> Role Administration Tools check the AD DS and AD LDS Tools
  • Click OK and Wait to Finish.

  • It will ask to Restart Now.
  • After Restart go in Control Panel - - > Administrative Tools.
  • Find all the Tools for the Active Directory.

Open Active Directory Users and Computers to start working.

Simple and you will not need any more remote connections in Domain Controller.

Have a nice weekend !!!


Deploy HYPER-V Failover Cluster in Windows Server 2012 - Part 1

$
0
0

One of the biggest challenge of IT today is to keep production environment healthy without downtimes. In IT world this means Replications, High Availability, Failover Clustering, Load Balancing. Today most of the Servers are Virtual Servers with Hypervisors to keep the Virtual Servers.

Today i will explain how can keep the HYPER-V Hosts without downtimes in any scenario except from Disaster Recovery. The solution is the Failover Clustering . What is Failover Clustering? 

Base on Microsoft << A failover cluster is a group of independent computers that work together to increase the availability and scalability of clustered roles (formerly called clustered applications and services). The clustered servers (called nodes) are connected by physical cables and by software. If one or more of the cluster nodes fail, other nodes begin to provide service (a process known as failover). In addition, the clustered roles are proactively monitored to verify that they are working properly. >>

Or you can read the Overview of Failover Clustering in https://technet.microsoft.com/en-us/library/hh831579%28v=ws.11%29.aspx?f=255&MSPPError=-2147217396

Let's start !!!


Prerequisites

Before proceed to install Failover Clustering must meet specific Requirements.

  • Servers that will use must contain same or at least similar components
  • You must use at least 2 Network Adapters. Dedicate Network adapters for network communication or iSCSI not both.
  • You must use Share Storage that is attached in Windows Server 2012 and not Local Storage of your Server.
  • Attach Storage should contain multiple, separate disks (logical unit numbers, or LUNs) that are configured at the hardware level.

For more details in every requirement that publish  you can open the Page from Microsoft  https://technet.microsoft.com/library/jj612869?f=255&MSPPError=-2147217396 

Install Failover Clustering Role in HYPER-V Hosts

  • Open Server Manager
  • Click in Manage and Select Add Roles and Features
  • Click Next in the Before you begin Screen

  • Select Role-Based or feature-based installation. Click Next.

  • Keep the default and click Next.

  • I don't need Server Roles so just click Next.

  • Find and tick the Failover Clustering. Click Add  Features in the Window that will appear. Click Next.

  • You can see the confirmation page. Click Install to start the installation.

  • Wait to finish the Installation and click Close.

Validate Cluster Configuration

After finish the installation of Failover Clustering Role before create the cluster it' s strongly recommended to run a full validation test for the cluster hardware configuration.

  • From the right side select Validate Configuration.

  • Just click Next in Before the Begin Window.

  • Add the Servers that will use as Clusters. In this scenario are HYPERV1 and HYPERV2. Click Next.

  • It's strongly Recommended to run all Tests. So keep the default options and click Next.

  • Here it's only a Confirmation Page with all the Tests that will proceed.Click Next.

  • Wait to finish the validation. It will takes some time. Most of the times it takes 10-20 minutes to finish.
  • When the validation finish you will get the Results. Click in View Report to get the full Report and see Warning or Errors if you have.  Or just check the Create the cluster now using the validation nodes to proceed with the Create Cluster Wizard.
  • As you can see i have some Warnings that must be check and Resolve it but i can continue to create the Culsters. Click Finish.

  • If you have errors you must Resolve it first and after continue to Create the Clusters. But in case of Warnings you can continue.But don't avoid to check the Warnings because in feature when the Clusters will be in Production maybe face serious problems that you don't want it. Now you have the time to Resolve this Warnings without press.

Create the cluster 

Now it's time to create the Clusters.

  • When the Validation finish it will start automatic the Create Cluster Wizard.
  • Click Next in Before you Begin Window.

  • Add the Cluster Name that will be use to Administering the Cluster. In my Scenario i choose Cluster Name HYPERV-ACL. This step i would like to explain with more details. The Cluster Name that will be use must be unique and not exist in your environment. Imagine that you create a new Server. The Server Name must be unique. So the same must be done here. When will be create the Cluster Name then automatic will be create a Computer Object in Active Directory where the cluster nodes computer objects are located.
  • Type the IP Address of your Cluster Name. Must be choose an available Ip Address of your Network.Click Next.

  • Check the Confirmation Page with all your settings and click Next.

  • Wait until Create the Clusters and click Finish.

  • Now go in Failover Cluster Manager and see the structure.
  • Expand the Cluster Name that created Before and click in Nodes.
  • In the Right Side will be see the 2 nodes and the status. 


We have already create the HYPER-V Clusters. We don't have finish yet. We must create th Cluster Share Storage, Create the Virtual Server and do Test to Verify that Failover Clustering working properly.

See you next Friday. Have a nice weekend !!!

If you already have question or just want to share your experience with Failover Clustering then you can share it through our Commented System.

Altaro VM Backup Review

$
0
0

Are the most important tasks Backup and Restore for every IT?If Backups aren't design with the right way can be catastrophic for the company. Every IT must give more attention to  design Backup Strategy and check it periodically if are healthy.

Today you can find lot of Backup Softwares in the market for small,midsize and enterprise companies. One of the Backup Softwares that choose to test is the Altaro VM Backup. I have hear good reviews from other IT Pro so i decide it to test and find how it's working.

So Let's start to explore Altaro VM Backup and find what can do.

Introduction

Today most or all Servers are Virtual. In most cases use only Physical Servers as HYPERVISORS for your Virtual Servers. You need a good solution for your Backup and Restores of the Virtual Servers. One of the available backup solutions in the Market is Altaro VM Backup.  Altaro can use it to backup Virtual Machines from HYPERV , VMWARE and one of the features that i like it is that can use it with HYPER-V and VMWARE IN Mixed Environment. 

If your company is small you don't need to pay for a Backup Solution Altaro VM Backup has a Free Edition that can backup up to 2VM's per Host. It's very interesting, cost effective and you can download it from 

http://www.altaro.com/vm-backup/download.php.

System Requirements

Before proceed with the installation of Altaro VM Backup must be check the System Requirements for the Hypervisors.

Microsoft Hyper-V:

  • Windows Server 2008 R2
  • Windows Hyper-V Server 2008 R2 (core installation)
  • Windows Server 2012
  • Windows Hyper-V Server 2012 (core installation)
  • Windows Server 2012 R2
  • Windows Hyper-V Server 2012 R2 (core installation)

 VMware:

  • vSphere: 5.0 / 5.1 / 5.5 / 6.0
  • vCenter: 5.0 / 5.1 / 5.5 / 6.0
  • ESXi: 5.0 / 5.1 / 5.5 / 6.0

Altaro VM Backup:

  • 1 GB RAM
  • 1 GB Hard Disk Space (for Altaro VM Backup Program and Settings) + 5 GB (for temporary files created during backup operations)

Altaro Hyper-V Host Agent:

  • 500 MB RAM

Altaro Offsite Server:

  • Minimum of i5 (or equivalent) processor
  • 75 MB RAM + an additional 75MB for each concurrent backup/restore. 
  • For example if running 3 concurrent backups then minimum requirement is 75MB (base) + 75MB + 75MB + 75MB = Total 300 MB RAM


Installation

Altaro VM Backup installation it's very simple and quick without need advance knowledge to proceed. Most important is to decide where must be install the Altaro VM Backup. 

Le's take a look in the installation process.

  • Check the I accept terms ...... and click Next.

  • Click Next to install the Altaro in Default Location

  • Click Install to start the Installation.

  • Wait until Finish and click Finish to Launch the Management Console.

  • When open then Management console the First Impression is a nice and friendly Dashboard. Because the Altaro open for first time the Dashboard is empty so i will explain with more details after take some backups.

  • The installation of Altaro VM Backup create few services in the Server.These are:
    Altaro Offsite Server = Altaro Offsite Server for Offsite Copies.
    Altaro VM Backup API Service = Enables an RESTful API interface to Altaro VM Backup.
    Altaro VM Backup Controller = Provides an interface between the Management Console UI and the Altaro VM Backup Service.
    Altaro VM Backup Engine = Management of backup schedules and configuration.
    Altaro VM Backup HYPER-V Host Agent = Facilitates backup and restore operations for Virtual machines on a Hyper-V Host.


Prepare to Backup Virtual Machines

Host Installation

After finish the installation it's time to prepare Altaro to take Backups of your Virtual Machines. Altaro need to install an Agent in every Host that you want to take backups of Virtual Machines.

 As i said before the User Interface it's very friendly and help a lot to do the tasks that must be complete faster. Before start i would like to inform that for the specific Scenario.

 i will use HYPER-V Hosts. But you can use it for HYPER-V,VMWARE or MixEnviroment.

So Let's start

  • Click in Hosts.
  • From the right side click Add Hosts.

  • Select the type of your Hypervisors and click Next.

  • Fill all the details to connect in the HYPERVISORS and you can test the Connection before proceed with the Next Step. So Click Test Connection or Next tostart the installation.

  • After few minutes if you don't have any errors  will inform you that the Agents setup successfully in the  Hosts. Click Next

  • As you can see has return in Main Screen with Hosts and lot of details.
    You can see the number of Virtual Machines that include in the Host, the Status of the Agent that installed in the Host, The status of the License.
  • You can click in Discovery Virtual Machines to refresh the number of Virtual Machines in case of add,delete or move  new Virtual Machines
  • If you have purchase Altaro you can click in 30 days License and add the License to Activated. Now i will add my Keys to Activate the Licenses.


Configure Backup Location

After setup successful the Hosts we must configure Backup Location to take the Backups.

  • Click in Backup Locations from the left side.
  • Click in Add Backup Location Button.

  • Select the type of Backup Location. Between Network Path and Physical Drive. For our purposes will select Network Path which means NAS or any other network location. Click Next.

  • Type all the details base on your selection. Click the Test Connection to verify the connectivity. Click Next.

  • Now you can see the Backup Location. As it says you can Drag & Drop the Virtual Machines to add in Backup Location. Very Cool and easy.
  • After add Virtual Machines in Backup Location you can see that in Infrastructure all the Virtual Machines has green color. 


That's it. You can continue to see how can schedule the Backup Tasks.

Schedule the Backups

You don't want to run manually the Backup for all the Virtual Machines. So it's time to schedule our Backups.

  • Click in Schedules from the left Side.
  • The User Interface it's similar with Backup Location. First of all you must have decide what hours you want to run the Backups Taks.
  • When decide the hours click in Add Backup Schedule.

  • Here we must configure how schedule will run. First we have the Option to select between Weekly and Monthly. After that we must set the time and which of the days to run the Backup Task. Last you can set the days that can run the Offsite backup that i will explain it later. When finish click Save and you can see the new Time in blue color.

  • Do the same step base on the Schedule Tasks that you have Plan 
  • When you finish with the Schedules drag & drop the Virtual Machine in the hour that you want to run the Backup. So simple !!!. Do the same for all the Virtual Machines. If you want you can add more than one Virtual Machines at the same time. But don't do it for large Virtual Machines. It will takes more than usual finish the Backups


Retention Policy for the Backups

It's recommended and must have Retention Policy for the Backups in your company.  Alta VM Backup can give you this option. Before start to create Retention Policies for your Backups you must already decide which  will be the Retention Policy.

Let's tae a look what we can do here.

  • Click in Retention Policies from the left Side.
  • By default if you don't have configure any Retention Policy all your Virtual Machines add in 2 Weeks Retention Policy. This means that you can go back in backups for 2 weeks.
  • If you want to create a new Retention Policy just click Add New.

  • Add the number of days that you want . Click Save Changes.

  • Drag & Drop the Virtual Machines that you want to apply the specific Retention Policy.

So easy and so fast we have apply Retention Policy for our Backups.

Configure Email Notifications

Last step to complete the configuration for the Backups of the Virtual Machines  is to set Email Notifications. With this way you can monitoring your Tasks daily if completed successful or not without need to login every day in the Server. Altaro VM Backup give you this option with the simplest way.

  • Click in Notifications from the left side
  • As you can see you have 3 options to check. I will check the first 2 which include Notifications for Successful and Failed Backups. I don't want to take emails for Restoration Taks.
  • Configure the Email Settings and Send Test Email to verify that you can receive Email from Altaro VM Backup.


Master Encryption Key

If you are love security Altaro VM Backup give you the option to use an Encryption Key in your Backups. So in case of stolen your Backups or any other scenario nobody can restore it if doesn't has The Encryption Key.

Let's explain it how can use this feature. But before proceed you must know that if you already start the Backups and add after the Master Encryption Key then the Backup must start from the scratch. As you will see in the example.

  • Click in Mater Encryption Keys from the left side.
  • Click in Click here to change it.

  • Type your key that you want to add.Click Save Changes.

  • Now go in Advance Settings from the left side
  • In the Encryption column check where you want to to have the Encryption. Of cource you can select all your Virtual Machine. Click Save Changes.

  • Be careful if you are in production environment because after that all the Backup will start from scratch.


My First Impression of the Configuration for the Backups is very good. Today every IT Pro need simple solutions and quick results. Altaro VM Backup can cover this requirements for every IT Pro in small and middle size companies.

Now it's time to leave it and run the Schedule Tasks to see the Results.


Take Backup Manual

Anytime you can Take Backup Manual for the Specific or Multiple Virtual Machines without need to wait until start the Schedule Task. Lot of times need to take a backup manual and restore it for test purposes. 

Let's take a look

  • Select Take Backup from the Left Side.
  • Check the Virtual Machine that you want to take backup manual. Click Take Backup.

  • Go in the Dashboard to check the Progress.

Restore

When you decide to choose a Backup Software you must have check also and the Restore Process. Restore is very important and must be sure that can works at any time. So let's take a look what can do Altaro VM Backup with the Restore.

Restore Virtual Machines

  • Click in Restore from the left side
  • Check the Backup Location to proceed. Click Next.

  • Select the Virtual Machine that you want to restore it.Click Next.

  • Here read careful all the options that you have,
    Restore the Version backed up on = If you have Retention Policy then you will have multiple backups base on the dates. Select from when you want to restore the backup
    Restore as = The Virtual Server Name that you want to restore it
    Restore to Host = The Host that you would like to restore
    Restore to Location = The path to restore the VM. Be careful here to select the appropriate path base on your HOST.
  • Check the Disable Network Card if you don't want to be online when the Virtual Machine Restore. Click Restore.

  • Click in Go to Dashboard Monitor Progress.

  • Check the Progress of the Restore.

File Level Restore

This is an option that can't be missing out from Altaro VM Backup. Lot of times requested to restore files from FileServer or any other Server. You can proceed with few steps to complete the File Level Restore

  • Select from Granual Restore the File Level Restore from Left Side.
  • Check the Backup Location to proceed. Click Next.

  • Select the Virtual Machine that you want to restore it.Click Next.

  • Choose the date of Backup that you want to Restore.

  • Click in Virtual Disk and select the avhdx file.

  • Click in Partition to Select the Partition that you want. Maybe here will be better if has the Letter of the Partition for better understanding.

  • After that you can see all the files from the specific Partition and you can proceed to Restore any file or folder that you want.
  • Check in the File or Folder that you want to Restore and click Next.

  • Select if you must Restore in Local Directory or Network Path and where must be Extract.Click Extract.

  • Wait until finish.

  • Go in the folder that have choose to extract and find the files.

My Impression for Restore Process is more than good. Quick easy and with lot of options. You can Clone your VM without need to overwrite the production VM, Restore Files, Exchange Server emails and all these features in a clean User Interface. 

Test & Verify your Backups

One very useful feature that has Altaro VM Backup is the ability to check if your Backups are good without affect the Live Virtual Machines. It's very important to know that your Backups are healthy and you will have at any time.

Let's take a look how can use Sandbox to Test and Verify health of Backups.

  • Select Test & Verify Backups.
  • You have 2 options.
    Verify Backup Folders =  Check the data store on the backup drive
    Perform a Full Test Restore = Check specific Virtual Machine Backup.
  • This is your choice. But for our purposes we will proceed with the 2nd option.
  • Select Perform a Full Test Restore  and click Next

  • Check the Backup Location to proceed. Click Next.

  • Select the Virtual Machine that you want to test it.Click Next.

  • Here read careful all the options that you have,
  • Restore the Version backed up on = If you have Retention Policy then you will have multiple backups base on the dates. Select from when you want to restore the backup
  • Restore as = The Virtual Server Name that you want to restore it
  • Restore to Host = The Host that you would like to restore
  • Restore to Location = The path to restore the VM. Be careful here to select the appropriate path base on your HOST.
  • Click Perform Test Restore.

  • Click Go to Dashboard to monitor progress.
  • Monitor the progress and Wait for the Results.

  • When finish you wlll get a popup in the top of the Altaro VM Backup as Notification which explain if complete successful or not and which is the reason who failed.

Reports

Another one useful feature for every IT Pro is the Reports. Altaro VM Backup can give us Operation History Reports or only Error History Reports. The most important is that you can find all Reports from the time to start using it.

 Very useful feature for any IT Pro that want to determine Errors or keep logs for Audits.


Today you can find lot of Backup Applications for HYPER-V or VMWARE in the market But  Altaro VM Backup can differentiate it from other softwares for the very friendly User Interface. Many usefull features that can activate with a simple click. 

These aren't only the features that has Altaro. I try to explain the most important with detail explanation for everyone. Altaro VM Backup has lot of Features yet like Offsite Backup , Exchange Item Level Restore and more that i promise depth explanation in my next article.

I hope to find interesting and help you in any decision related with Backups.

Have a nice weekend !


Viewing all 85 articles
Browse latest View live


Latest Images